How To Set Static IP Address in Windows 10/11 using CMD
In this tutorial, we are going to see how to set static IP address in Windows 10/11 using CMD. There are several methods to set a static IP address in Windows 10/11. In this tutorial, we will see together how to set a static IP address from the Command Prompt.
In Windows 10/11, setting a static IP address for your device is an essential configuration that may be required in a number of scenarios. For example, if you plan to share files or a printer on a local network, or when you try to set up port forwarding.
If you do not assign a static IP address, the services your computer provides to other devices will eventually stop working. This is because, by default, connected devices use dynamic IP addresses assigned by the Dynamic Host Configuration Protocol (DHCP) server (usually the router), and may change as soon as you reboot your machine or after the dynamically assigned configuration expires.
⚙️ How To Set Static IP Address in Windows 10/11 using CMD
Using CMD may seem difficult for some users, yet it is one of the fastest ways to assign a static IP address in Windows 10/11.
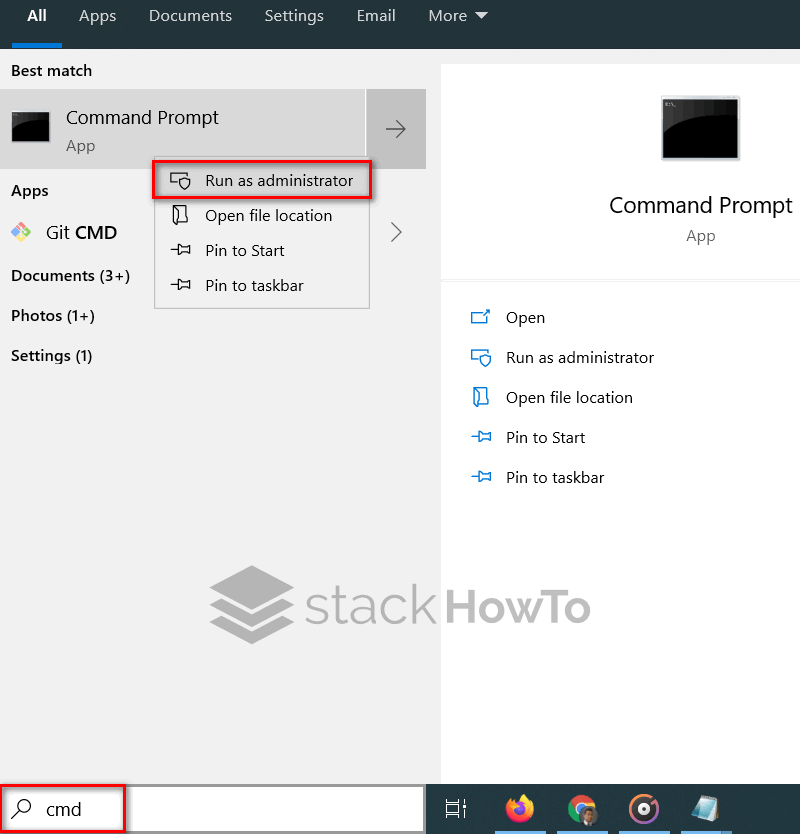
✅ Step 1: There are two ways to open the command line. Click on the Start menu, type CMD in the search box, then right-click on it and select Run as administrator. Or press WIN + R, type CMD, and press Enter.
✅ Step 2: In the Command Prompt window that opens, enter the following command to see your current network configuration by copying and pasting and validating with the Enter key:
ipconfig / all
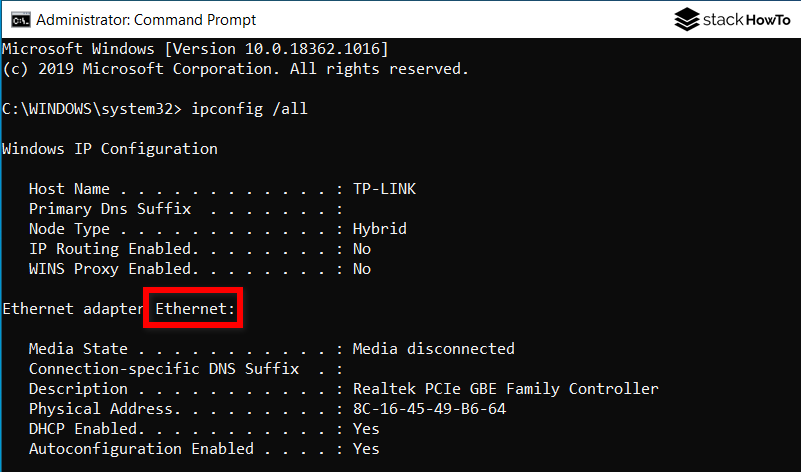
Under the network card, note the card name (here Ethernet) and the following information:
- IPv4 address
- Subnet mask
- Default gateway
- DNS servers
✅ Step 3: Type the following command to assign a static IP address and press Enter. Of course, in the command below, make sure to change Ethernet to the name of your network card, but also change 192.168.1.128, 255.255.255.0, and 192.168.1.2, subnet mask, and default gateway address that matches your configuration.
netsh interface ip set address name="Ethernet" static 192.168.1.128 255.255.255.0 192.168.1.2

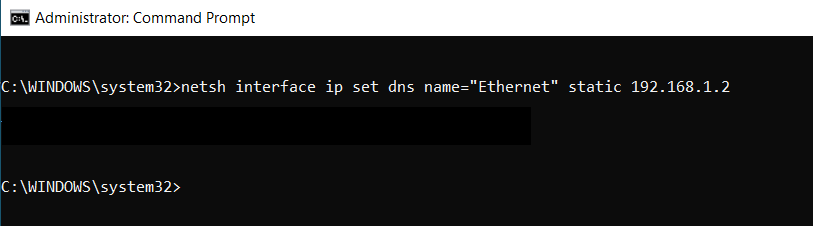
✅ Step 4: Type the following command to set a DNS server address and press Enter. Again, be sure to change Ethernet to the name of your network card and 192.168.1.2 to the address of your network’s DNS server.
netsh interface ip set dns name="Ethernet" static 192.168.1.2
✅ Step 5: Then type the following command to set another DNS server address and press Enter. Again, be sure to change Ethernet to the name of your network adapter and 8.8.8.8 (Google DNS) to another DNS server address (if desired).
netsh interface ip add dns name="Ethernet" 8.8.8.8 index=2

Once the steps are complete, you can test the new configuration using the ping command (for example, ping google.com) to see if the Internet works. Alternatively, you can simply open your web browser and try browsing a website to see if the configuration works.
🧠 Summary
Setting a static IP address in Windows 10/11 using Command Prompt is a straightforward way to take control of your network configuration especially useful for troubleshooting, improving stability, or setting up network devices that require consistent IPs. Just make sure to input the correct values for your network adapter, IP address, subnet mask, gateway, and DNS servers. After applying the changes, test your connection to ensure everything is working properly. If you encounter any issues, double-check your configuration or revert to automatic settings using the same netsh commands.