How to Change DNS Server in Windows 10
In this tutorial, we are going to see how to change DNS server in Windows 10. A DNS (Domain Name System) is a service that translates domain names (e.g. google.com) into IP addresses (e.g. 216.66.198.56) so that you can access websites, services and other resources on the Internet more easily. Without DNS, it would be impossible, for example, to access Google via the address https://www.google.com. You can think of DNS as a directory.
When you use the Internet connection of your Internet Service Provider (ISP), you use its DNS servers by default. Xfinity, Verizon, AT&T, Spectrum, etc.. have their own DNS servers.
If you wish, you can use other DNS servers such as those of Cloudflare, OpenDNS or Google Public DNS which can give you access to interesting features that those of your ISP cannot offer you: faster response time, access to blocked websites, reinforced protection against hackers…
How to Change DNS Server in Windows 10
By default, your computer uses the DNS provided by the DHCP server of your ADSL/fiber box or by your router. In 99% of the cases, your computer uses the DNS of your Internet Service Provider (ISP).
On this tutorial, we will see how to replace the default DNS and manually set new DNS on a Windows 10 PC in several different ways.
As an example, we will configure Cloudflare DNS.
Method 1: Change DNS Server Using Setting
To change the DNS on Windows, you can use Settings:
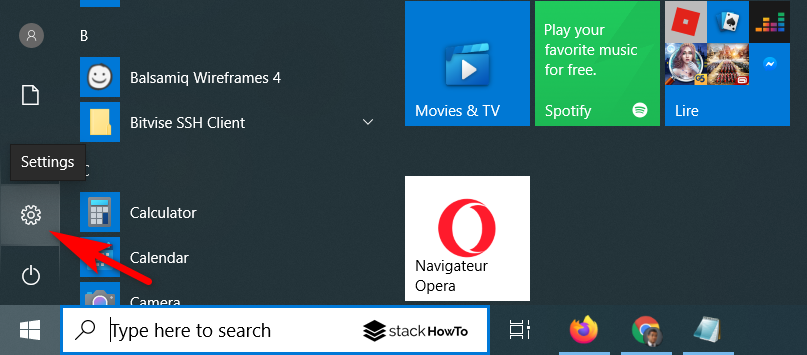
Step 1: Click on the Start button at the bottom left of your screen.

Step 2: Click on Settings.
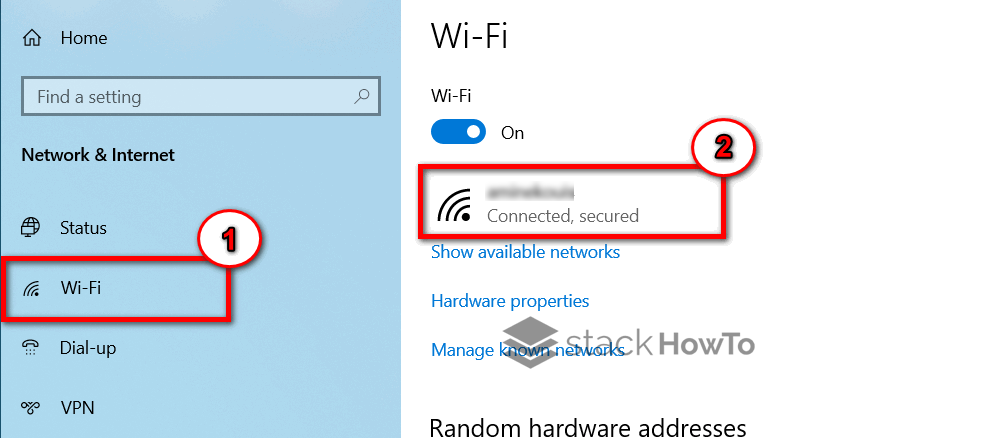
Step 3: Select Network & Internet.

Step 4: On the left, select either Wi-Fi or Ethernet depending on the type of connection you are using. Click on the active network connection.
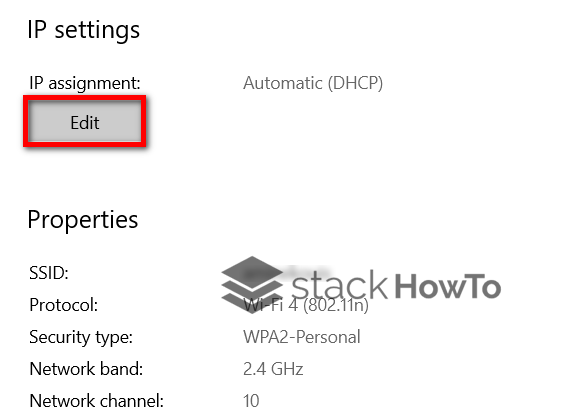
Step 5: Scroll down. Under IP Settings, click the Edit button.
Step 6: Choose Manual.
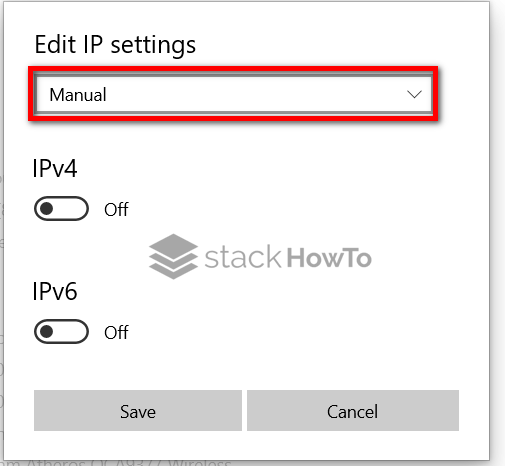
Step 7: Enable IPv4 and fill in the Preferred DNS and Alternate DNS fields with the desired primary and secondary DNS servers.
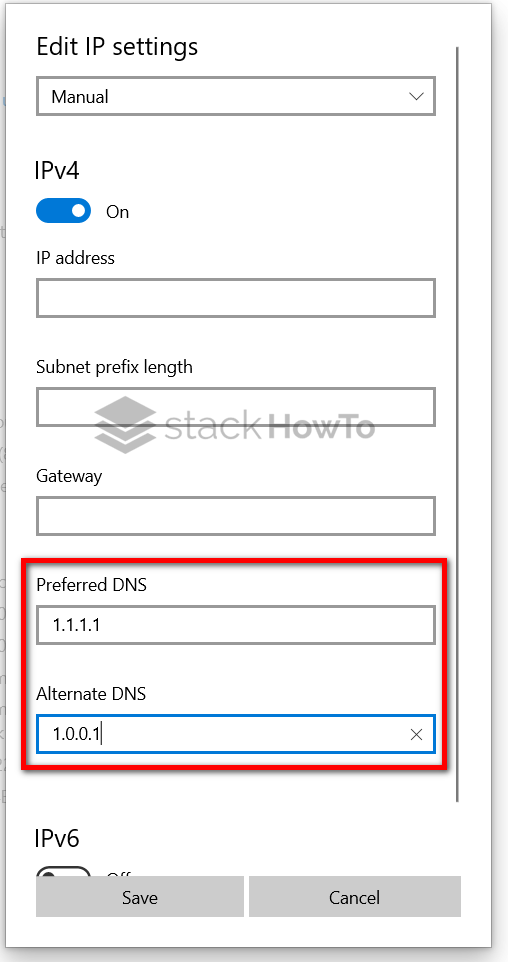
Step 8: If possible, do the same with IPv6.
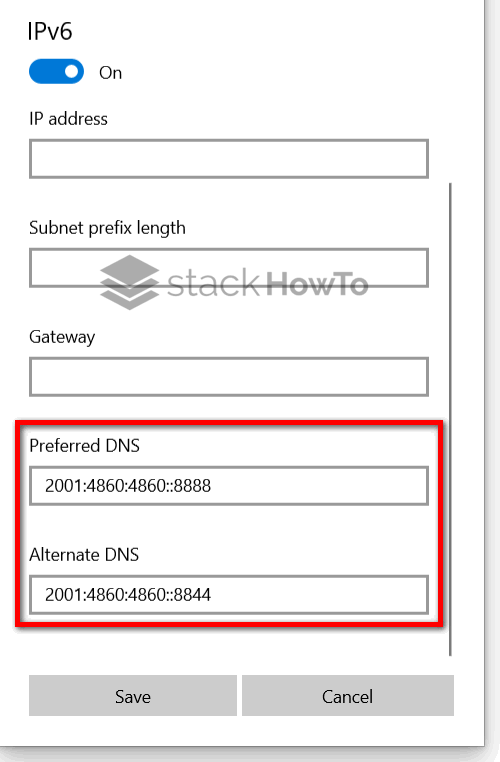
Step 8: Click on Save.
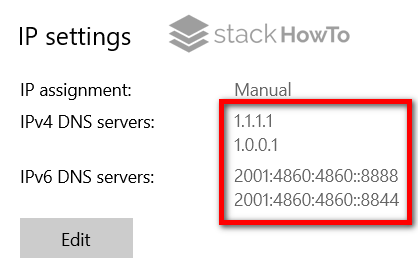
Step 9: Check that your custom DNS has been applied to the network connection.
Step 10: Clear DNS cache on Windows.
Method 2: Change DNS Server Using Control Panel
To change DNS on Windows, you can use the Control Panel:
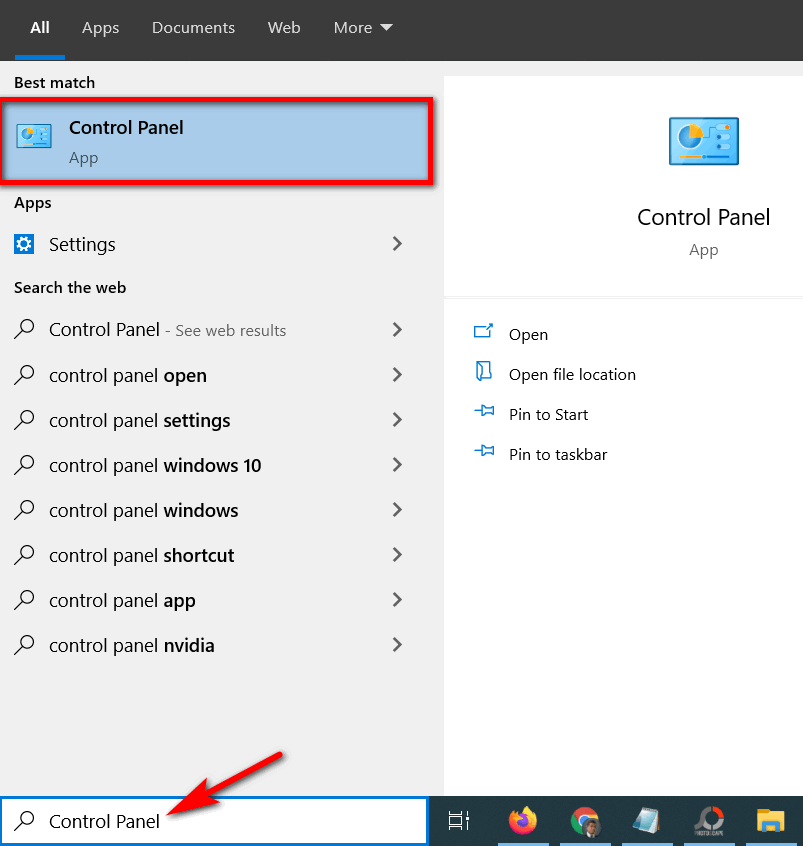
Step 1: Click on the Start menu and type Control Panel.
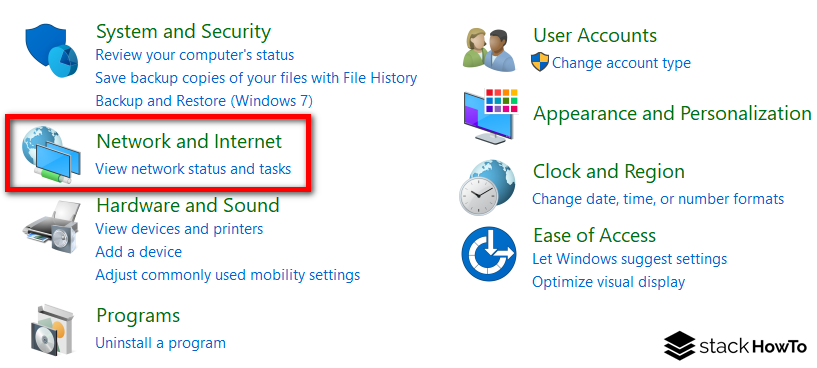
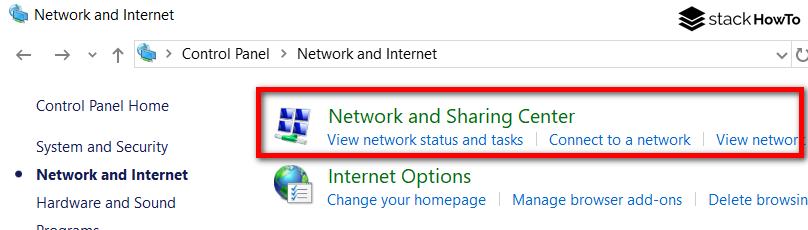
Step 2: Then click on Network and Internet.
Step 3: And go to the Network and Sharing Center section.
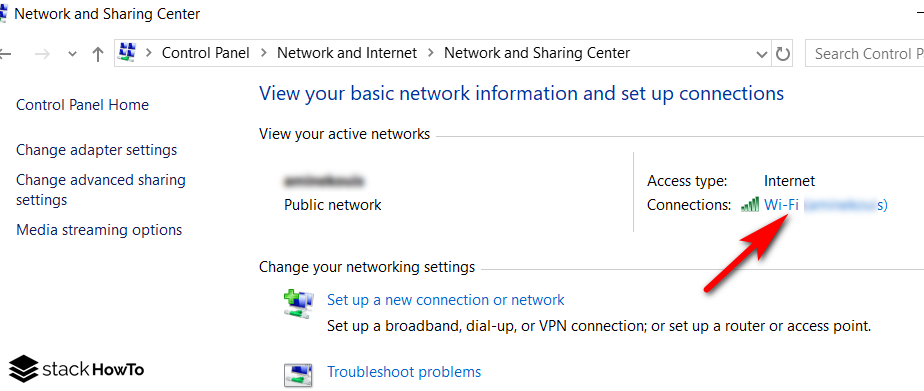
Step 4: From there, click on the link for your WiFi connection.
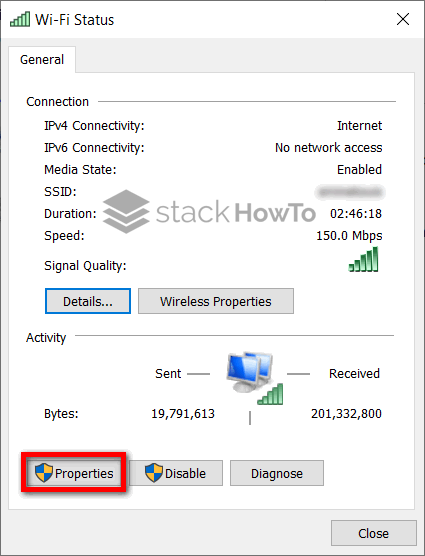
Step 5: Then click on Properties.
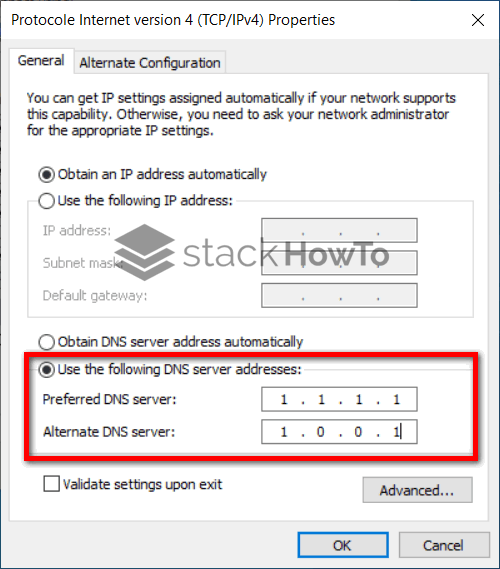
Step 6: Select Internet Protocol version 4 (TCP/IPv4) and click on Properties.

Step 7: Check Use the following DNS server address and then enter the IPv4 addresses of your DNS in Preferred DNS server and Alternate DNS server.
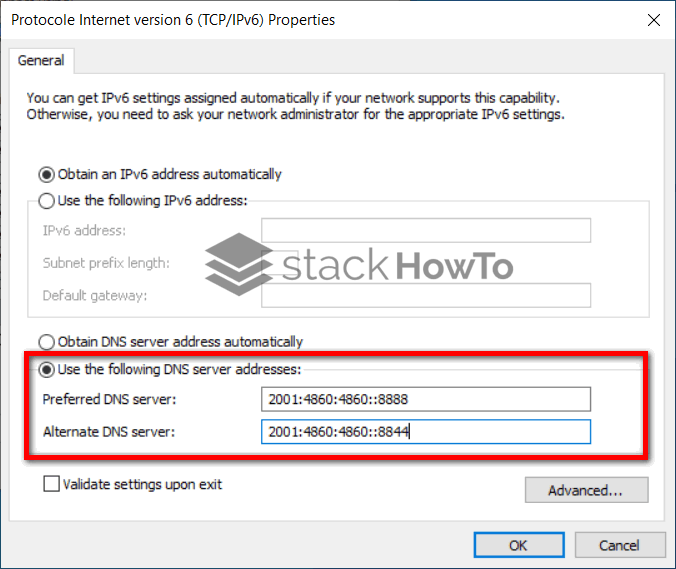
Step 8: Do the same with Internet Protocol version 6 (TCP/IPv6).
Step 9: Close the Control Panel.
Step 10: Clear DNS cache on Windows.