How to Format a Hard Drive or SSD in Windows 10
In this tutorial, we are going to see how to format a Hard Drive or SSD in Windows 10. Formatting a hard drive or SSD means deleting all the information that is stored on the hard drive. It also means setting up a file system so that your operating system can read and write data to the hard drive or SSD.
No matter how complicated it may sound, it is not really difficult to format a hard drive from any version of Windows. This is a very basic function that all operating systems have, and Windows makes this task quite easy.
The time required to format a hard drive in Windows depends largely on the size of the drive, but also on the overall performance of your computer.
Follow the few steps below to format a hard drive in Windows 10, Windows 8, Windows 7, Windows Vista, or Windows XP.
Method 1: Format a Hard Drive or SSD Using File Explorer
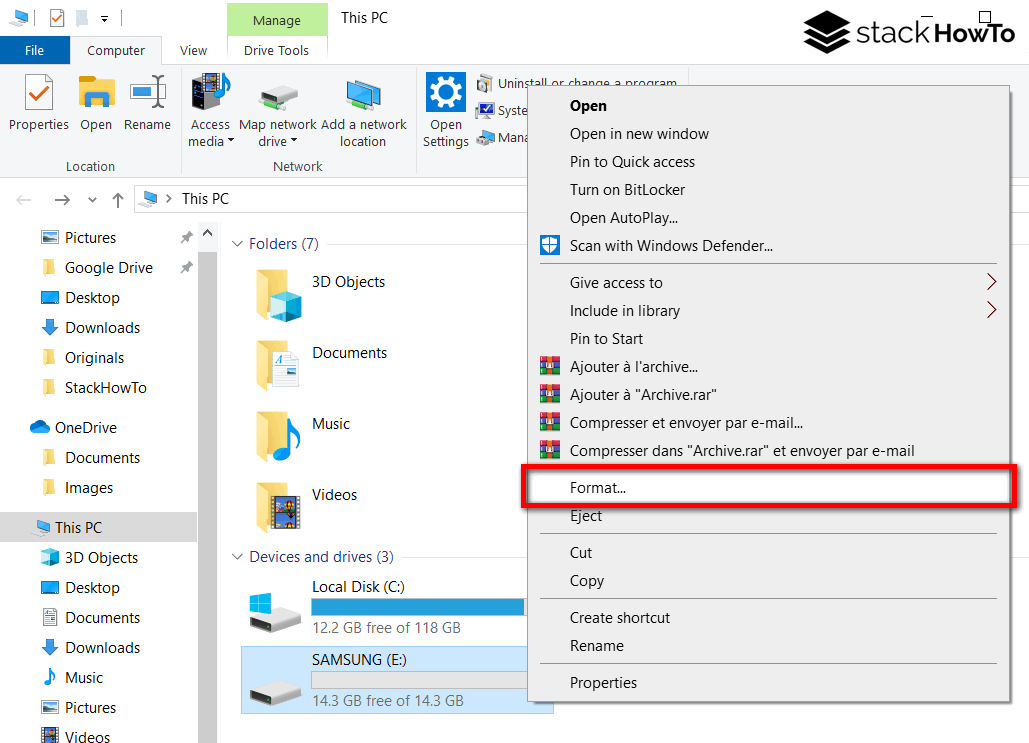
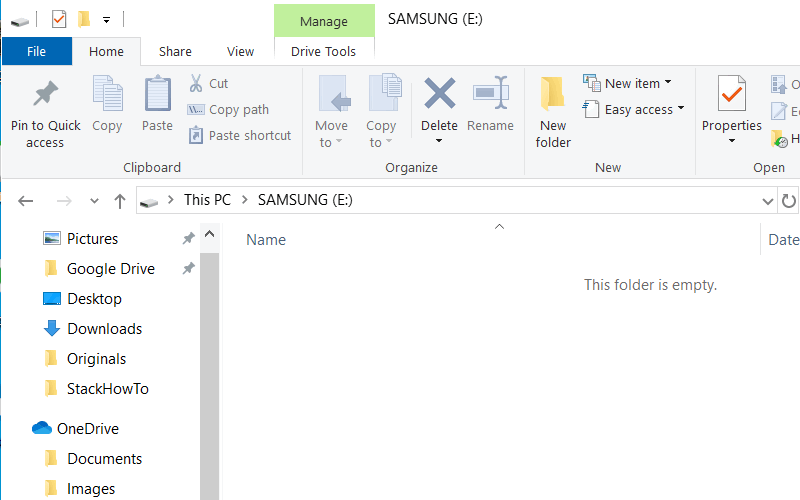
Step 1: Open File Explorer.
Step 2: Right-click on the disk volume (here SAMSUNG) then Format.
Step 3: Select the following options:
- File system: choose the file system according to the use of the disk. For full compatibility with all systems and devices, choose exFAT (or FAT32).
- Allocation unit size: the default allocation size.
- Volume name: enter a name that will allow you to easily identify the volume (e.g. the name of the brand and/or model of the disk).
- Quick Format: if checked, deletes only the file system of the volume and replaces it by a new one. The files currently on the volume will only be dereferenced but not deleted. If unchecked, Windows will perform a zero formatting: each data bit (0 or 1) of the volume will be replaced by a zero. As a result, all files will be deleted and unrecoverable. This operation can take quite some time depending on the size of the volume and the performance of the disk.
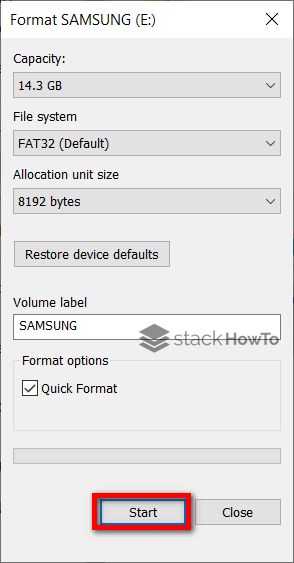
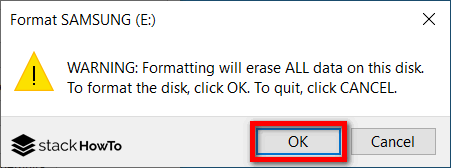
Step 4: Click the Start button and then click OK to start formatting the partition.
And that’s it, the disk partition has been properly formatted!
Method 2: Format a Hard Drive or SSD Using Disk Management tool
Step 1: Open the Disk Management tool :
- via the Run command (Wind + R): diskmgmt.msc.
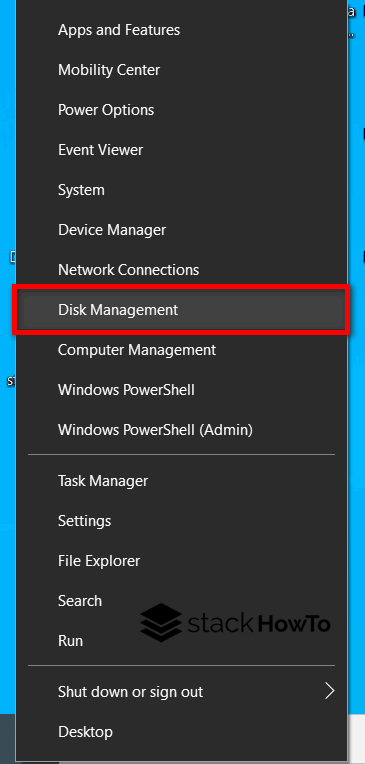
- via the Quick Link menu (Wind + X):
Step 2: Locate the disk volume (here SAMSUNG (E:)) and then right-click on it. Then Format.

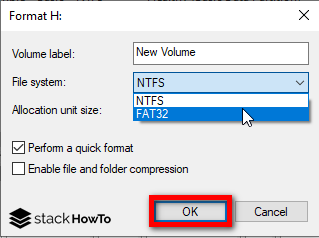
Step 3: Select the following options and click OK.
- Volume name: Enter a name that will allow you to easily identify the volume (e.g. the name of the brand and/or model of the disk).
- File system: choose the file system according to the use of the disk. For full compatibility with all systems and devices, choose exFAT (or FAT32).
- Allocation unit size: by default.
- Quick Format: if checked, removes only the file system from the volume and replaces it with a new one. The files currently on the volume will only be dereferenced but not deleted. If unchecked, Windows will perform a zero formatting: each data bit (0 or 1) of the volume will be replaced by a zero. As a result, all files will be deleted and unrecoverable. This operation can take quite some time depending on the size of the volume and the performance of the disk.
Step 4: Confirm that you want to format the partition.
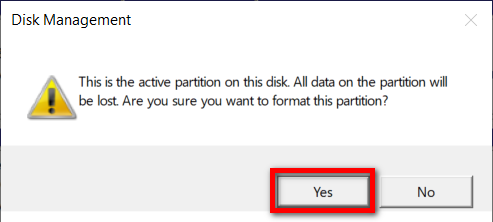
And that’s it, the disk partition has been properly formatted!
Method 3: Format a Hard Drive or SSD Using DiskPart
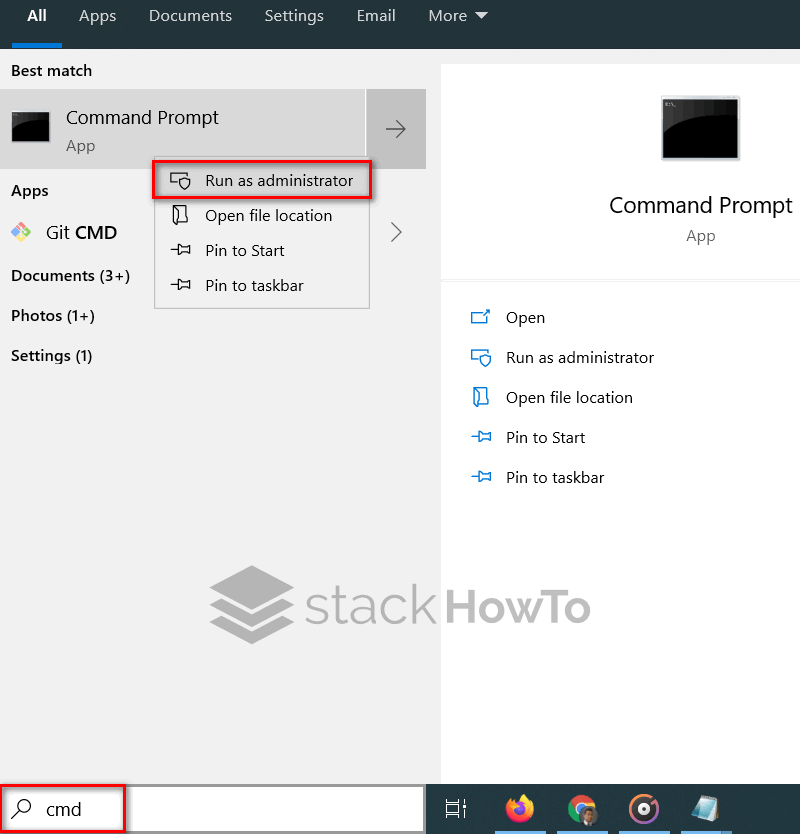
Step 1: There are two ways to open the command line. Click on the Start menu, type CMD in the search box, then right-click on it and select Run as administrator. Or press WIN + R, type CMD, and press Enter.
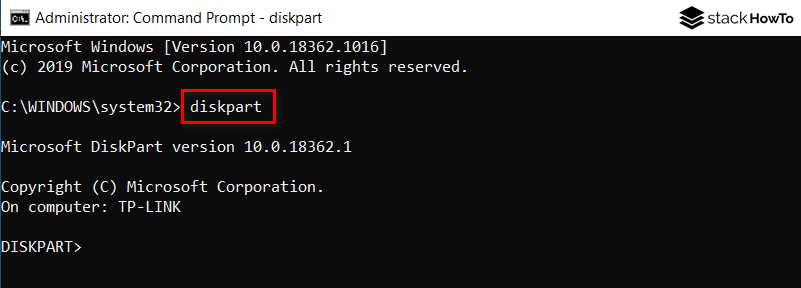
Type diskpart in CMD to start it.
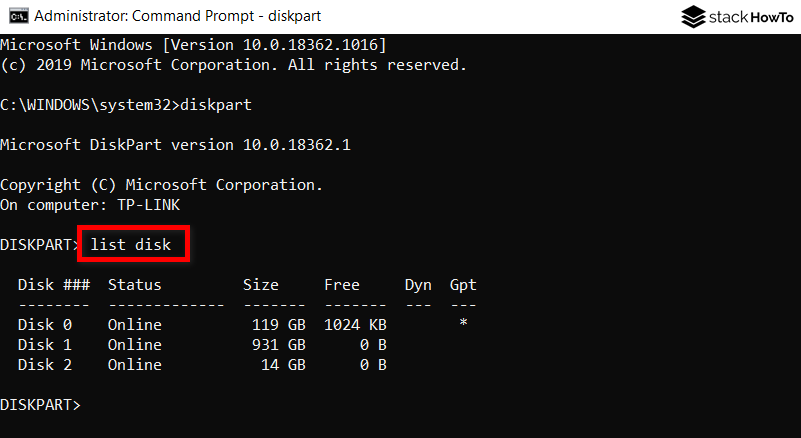
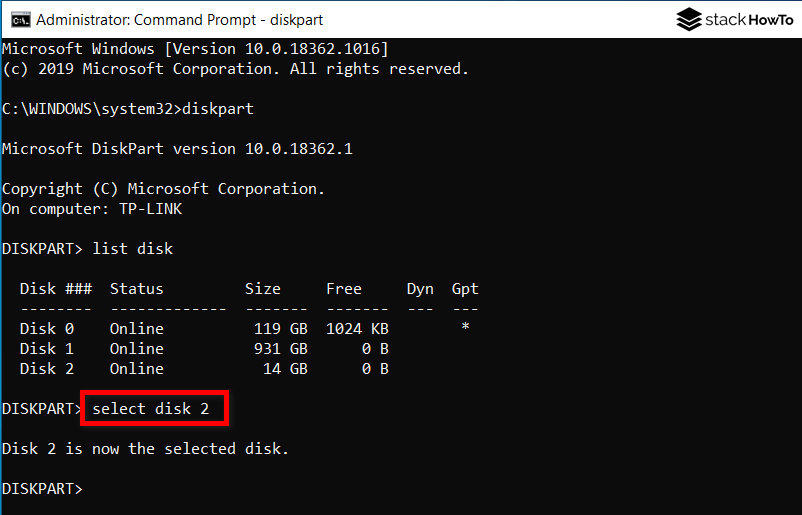
Step 2: Type list disk and press Enter. To identify the number of the disk containing the partition to be formatted.
Step 3: Select the disk (replace 2 with the disk number):
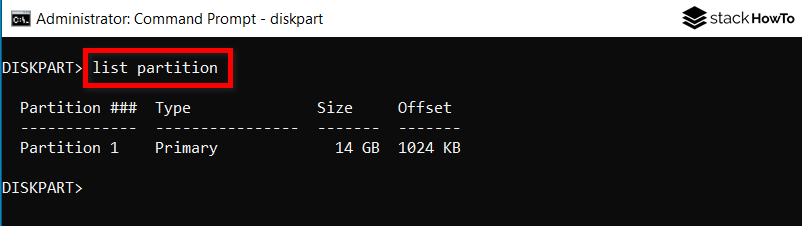
Step 4: Identify the number of the partition to be formatted:
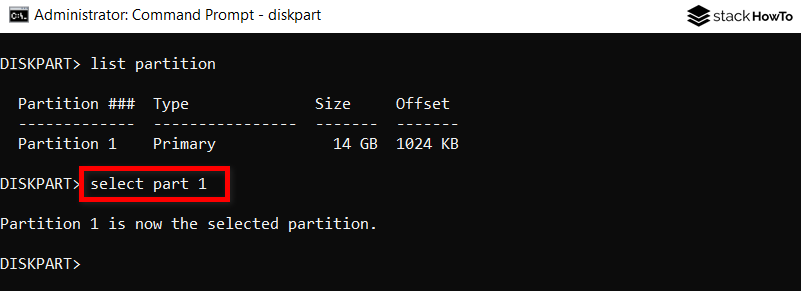
Step 5: Select the partition (replace 1 with the partition number):
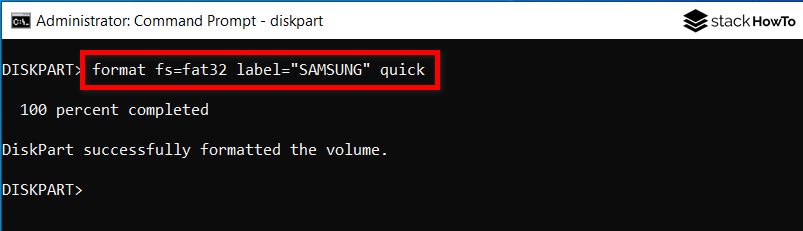
Step 6: Format the partition with the desired file system (fs), a label, with or without a quick format, example :
1. in FAT32, with the SAMSUNG label, by performing a quick format :
format fs=fat32 label="SAMSUNG" quick
2. in NTFS, with the LG label, without quick format :
format fs=ntfs label="LG"
And that’s it, the disk partition has been properly formatted!