How to Fix Right Click on Desktop Not Working in Windows 10
In this tutorial, we are going to see how to fix right click on desktop not working in Windows 10. There are a number of different things that can cause right-click problems on the Windows 10 desktop. There are several ways to solve the problem. We will see three different ways to solve the problem. Follow the methods one after another until the problem is solved.
Fix 1: Disable Tablet Mode to Fix Right Click on Desktop Not Working in Windows 10
Windows 10 has a built-in tablet mode that is very useful for touch devices and tablets or hybrids like Surface Pro. When tablet mode is enabled, the desktop is hidden to show the full-screen start menu. Therefore, you cannot right-click on the desktop.
Tablet mode is disabled by default. However, Windows may enable Tablet mode automatically in some cases. If this is the case, you can disable tablet mode completely to get your right-click on desktop back.
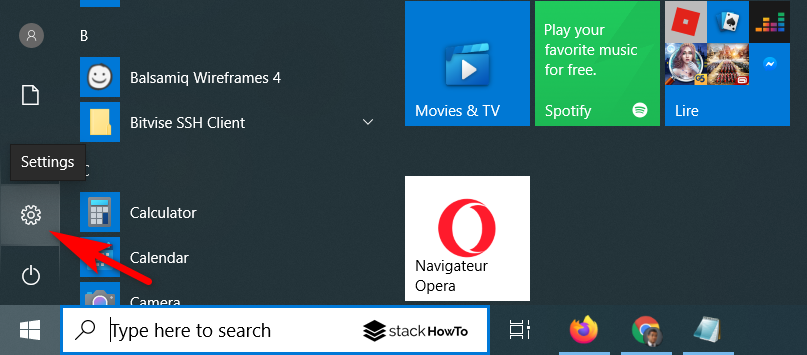
Step 1: Click on the Start button at the bottom left of your screen.

Step 2: Click on Settings.
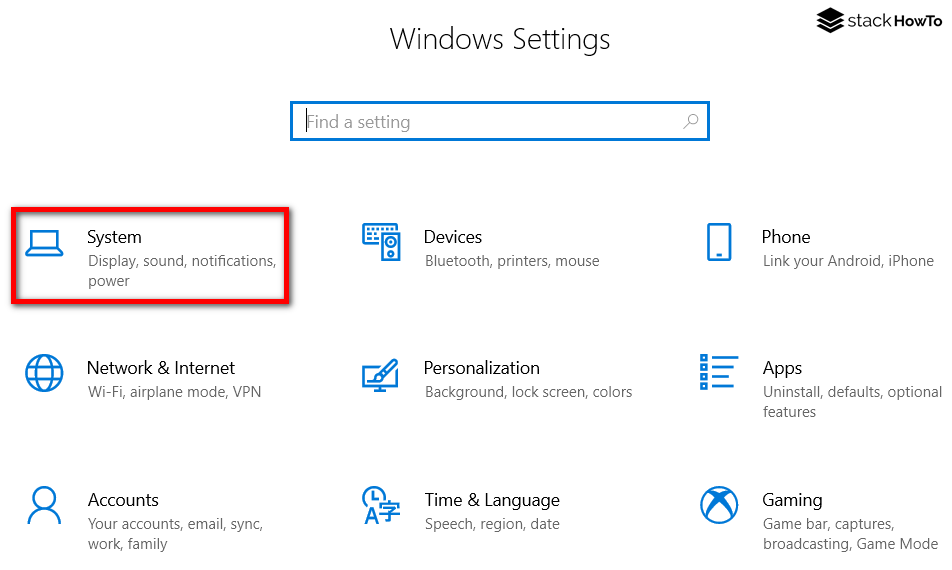
Step 3: Then go to System.
Step 4: Once in the system settings, click on Tablet mode in the left pane. Then select Use desktop mode in the drop-down menu under When I sign in.
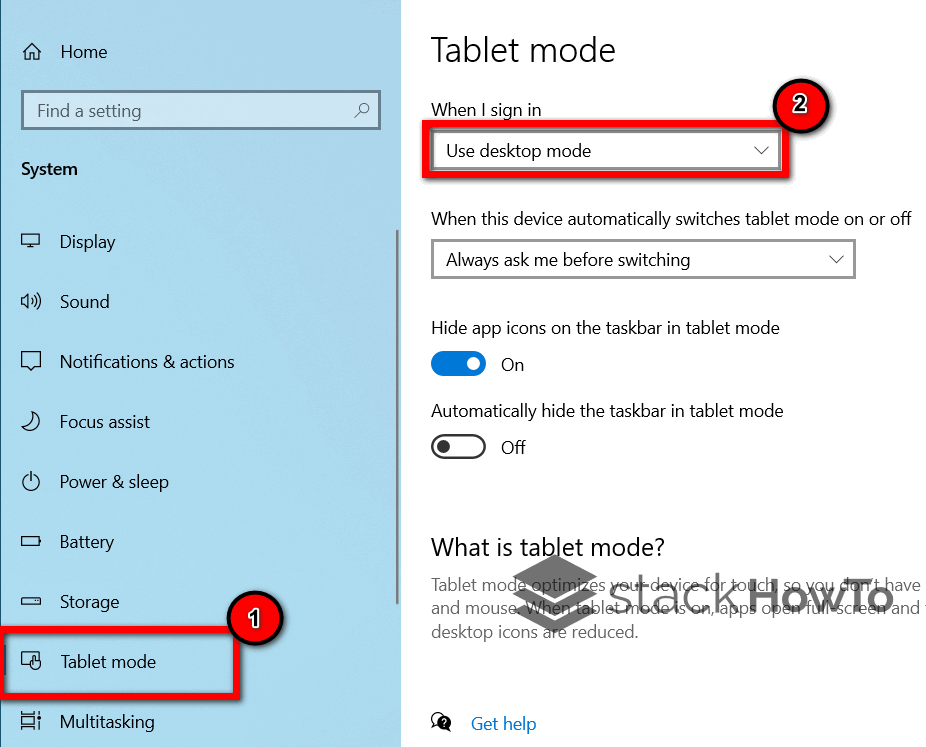
That’s it. You should now find the desktop mode and be able to right-click on it.
Fix 2: Run the DISM tool to Fix Right Click on Desktop Not Working in Windows 10
Running the built-in DISM tool solves many problems in Windows.
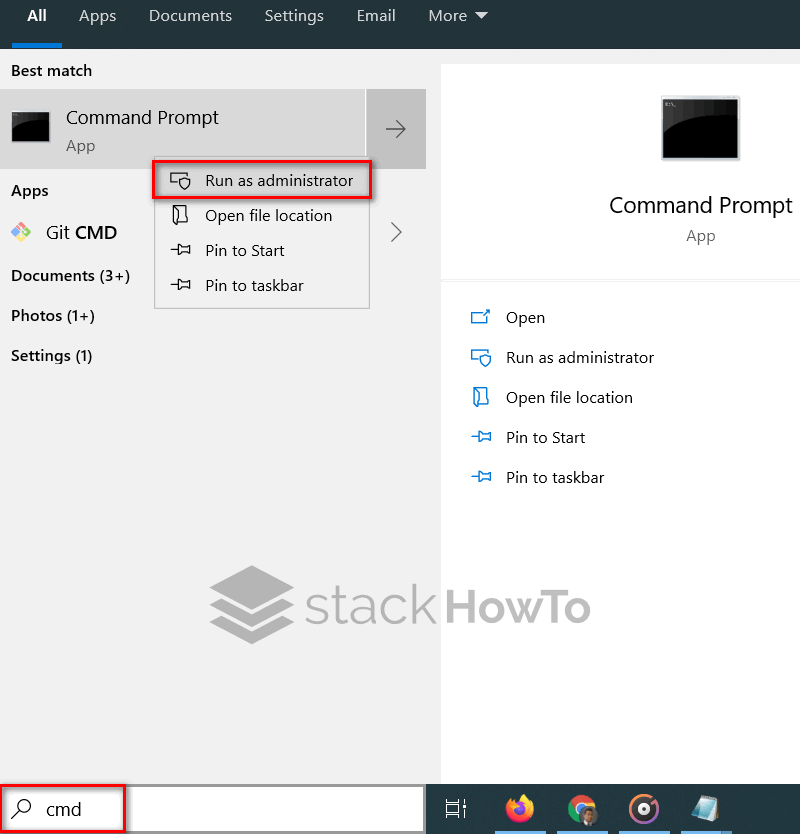
Step 1: There are two ways to open the command line. Click on the Start menu, type CMD in the search box, then right-click on it and select Run as administrator. Or press WIN + R, type CMD, and press Enter.
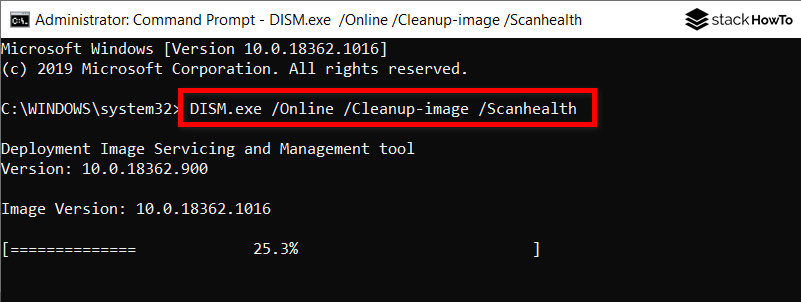
Step 2: In the Command Prompt window that opens, enter the following command by copying, pasting and validating with the Enter key:
DISM.exe /Online /Cleanup-image /Scanhealth
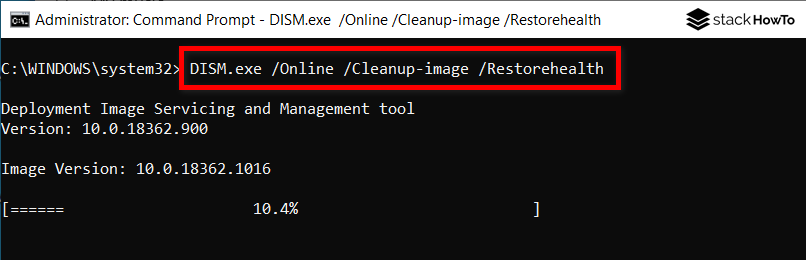
Step 3: Next, run the following command.
DISM.exe /Online /Cleanup-image /Restorehealth
That’s it. The above commands will scan your system and restore all corrupted files. This should solve the problem.
Fix 3: Use Regedit to Fix Right Click on Desktop Not Working in Windows 10
Sometimes, the registry value called NoViewContextMenu can cause this problem. Thus, changing this value should allow right-clicking on the desktop.
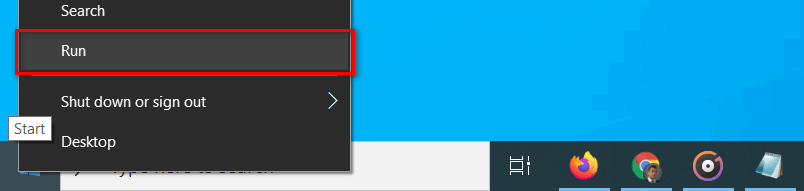
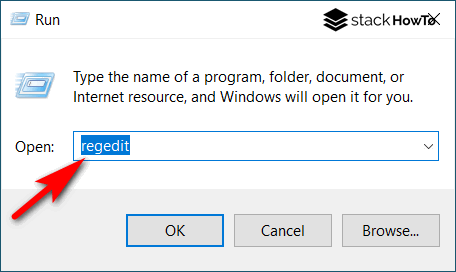
Step 1: To lock screen after inactivity on Windows 10. Right-click on the Start button, select Run.
Step 2: Type regedit and press Enter to open the Registry Editor.
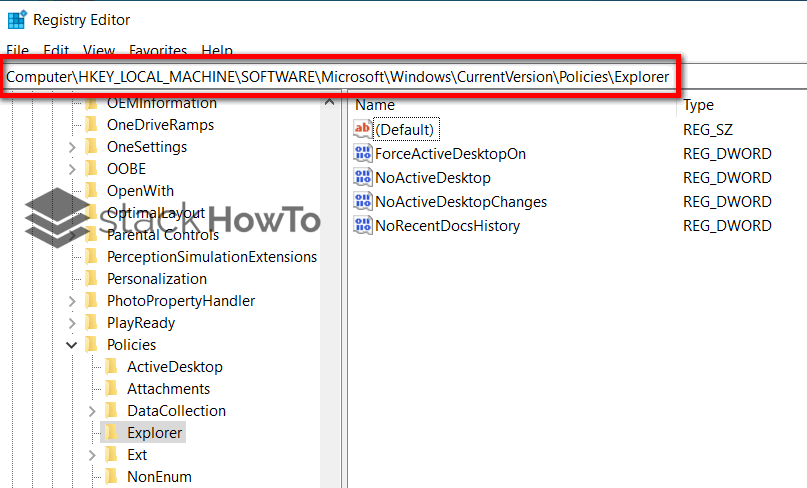
Step 3: After that, navigate to the following Registry key:
Computer\HKEY_LOCAL_MACHINE\SOFTWARE\Microsoft\Windows\CurrentVersion\Policies\Explorer
Step 4: In the right pane, right-click on an empty space and select New -> DWORD (32 bits) value option.
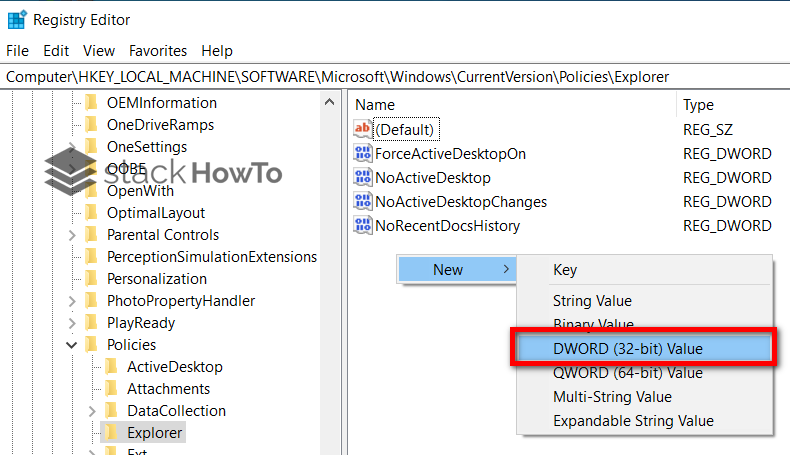
Step 5: Name it NoViewContextMenu.
Step 6: After creating the DWORD value, double-click on the value. Type “0” in the value field. Then click on the OK button.

Step 7: To apply the changes, restart your system.
That’s All!