Frame Tkinter | Python 3
In this tutorial, we are going to see how to use Frame widget in Tkinter. The Frame widget is very important for the process of grouping and organizing other widgets in a somewhat user-friendly way. It functions as a container, which is responsible for organizing the position of other widgets.
It uses rectangular areas on the screen to organize the layout of these widgets. A Frame can also be used as a base class to implement complex widgets.
Syntax:
Here is the syntax to create this widget:
frame = Frame ( master, option = value, ... )
Parameters:
- master : This represents the parent window.
- options : See below for a list of the most commonly used options for this widget. These options can be used as comma separated key-value pairs.
Example:
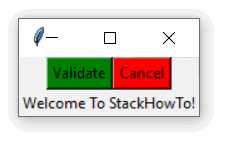
from tkinter import *

gui = Tk()
frame1 = Frame(gui)
frame1.pack()

frame2 = Frame(gui)
frame2.pack(side = BOTTOM)

btn1 = Button(frame1, text="Validate", bg="green")
btn1.pack(side = LEFT)

btn2 = Button(frame1, text="Cancel", bg="red")
btn2.pack(side = LEFT)

label = Label(frame2, text="Welcome To StackHowTo!")
label.pack(side = BOTTOM)

gui.mainloop()
Output:
Frame widget options
| bd | Border width in pixels. The default value is 2. |
| bg | Background color. |
| height | The vertical dimension of the Frame. |
| highlightcolor | The color of the focus when the widget has the focus. |
| relief | Relief specifies the type of border. Some of the values are SUNKEN, RAISED, GROOVE and RIDGE. |
| width | Default frame width is determined by the size of the image or text displayed. |